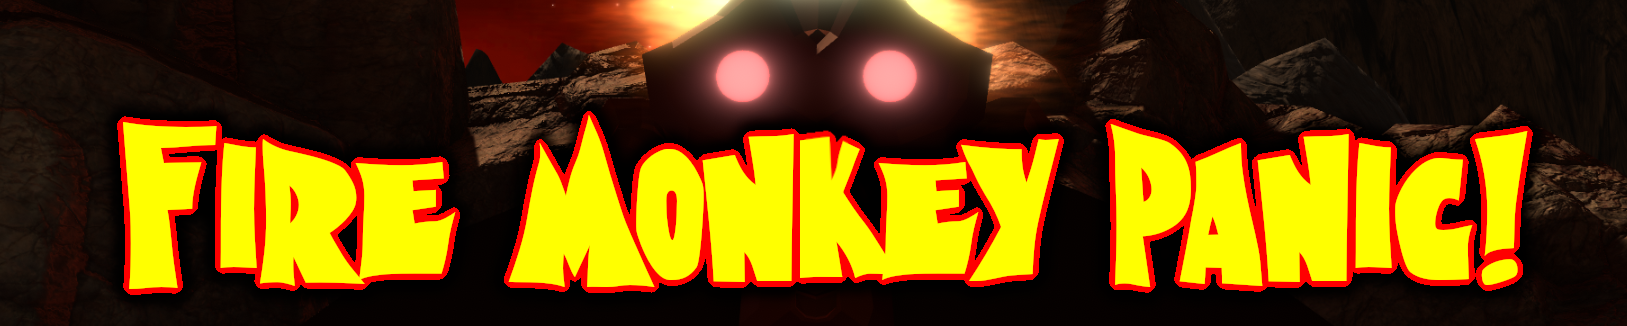
Fire Monkey Panic
Fire Monkey Panic Postmortem
Introduction
Fire Monkey Panic is a 3D platformer designed for speed-running created for an assignment in Game Level Editing (GAME 132) at Johnson County Community College. The game has two levels with the first level being more straightforward and the second being more challenging. As with the creations for this or previous game dev courses, I always seek to find one or two extra features or techniques with which I can explore and experiment while still satisfying all of the assignment requirements.
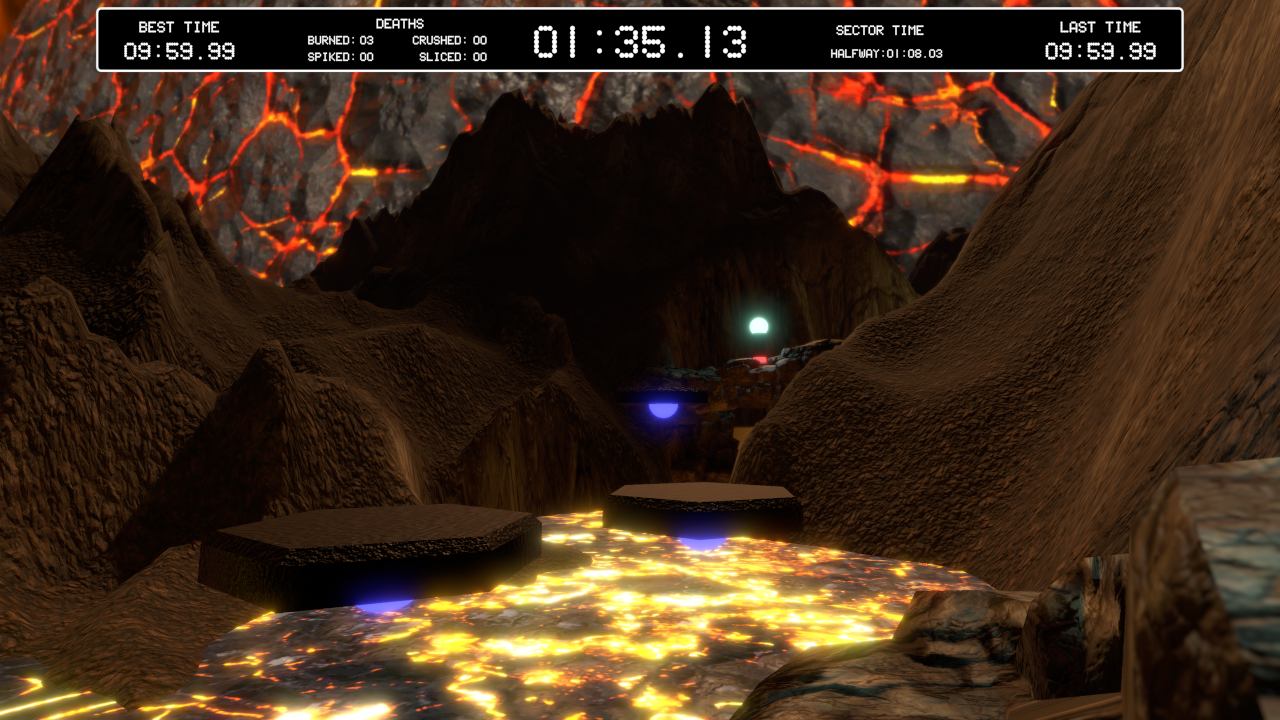
In this assignment, the levels need to be completable by a new player going at a walking pace in between two and four minutes, have multiple checkpoints, advanced movement challenges and feature a sculpted terrain. My stretch goals were to create portable movement scripts and experiment with creating and utilizing emissive materials. Both of these were implemented liberally throughout both levels of the game.
What Went Well
Portable Movement Scripts
Rather than writing the same bits of code over and over, it seemed prudent to create some basic movement scripts that are generic enough to be useable in a wide variety of circumstances both for this current project and for future projects. With moving platforms featuring heavily into any platforming game, I decided to write a set of three scripts that execute the three basic movement types: translation, rotation, and revolution. An important consideration for all of these movement scripts is that all physics-related behaviours should be performed in FixedUpdate() so that the game’s framerate does not alter the behaviour of the object.
Translation
There are many ways to execute a simple ping-pong movement between two points, but the change in direction at the end points in a basic ping-pong script can be very jarring. I wanted smoother motion with the object slowing down at both end points. This I achieved with the use of a cubic spline, but I wanted my script to be more useful than to just execute a smooth-start, smooth-stop type of spline. In addition to the two end points, the two control points for the spline can be defined in the inspector as can the period for the spline. This allows a wide range of pathing solutions including the smooth-start, smooth-stop behaviour I needed for this current project. You can see more about the mathematics of LERPs and splines, and specifically cubic splines, at https://xorpheous.itch.io/jccc-spline-demo.
Rotation
There is not much to add to a basic rotation script. To make this as flexible as possible, the angular velocity for each axis can be supplied either in the inspector or by script since the angular velocities are defined as public variables. These are then compiled into a single angular velocity vector. This vector is used to rotate the object using the following method:
transform.localEulerAngles += angVelocity * Time.FixedDeltaTime;
The difference between this script and others I’ve seen for creating a rotating object is that the angular velocity is adjustable on the fly. That is, other scripts can adjust the rotation speed based on events in the game. This is not a feature that I utilize here, but it is something that would be useful in future projects.
Revolution
Rotation and revolution are often used interchangeably, viewed as synonymous terms. They absolutely are not. To rotate means to spin about an axis through an object. For example, the Earth rotates about an axis through its North and South Poles once ever day. To revolve means to move around some object or point. Keeping with the Earth as an example, the Earth revolves about the Sun once every year. The Rotation script mentioned above serves well for something spinning about a centralized axis, but it does not serve for motion around some central point outside of the object.
Revolution, not rotation, is exactly what I wanted for some of my platforms. I choose to keep this method simple and focused on the current application, so the revolution axis is hard-coded as the y-axis. As with the rotation method, the angular velocity about the y-axis is specified in the inspector. In addition, there is also a radius parameter that is adjustable in the inspector. The platform is placed as a child of an empty game object and the revolver script is attached to that empty game object. The platform is placed at the distance from the empty parent game object as specified in the inspector and each frame the current angle from the +x-axis is calculated based on the given angular velocity and the current x- and z- components are determined from this angle. The object is then translated to this new position.
currentAngle += angVelocity * Time.fixedDeltaTime;
newPosition = new Vector3(radius * Mathf.Cos(Mathf.Deg2Rad * currentAngle), orgY, radius * Mathf.Sin(Mathf.Deg2Rad * currentAngle));
platform.transform.localPosition = newPosition;
Emissive and Reflective Materials
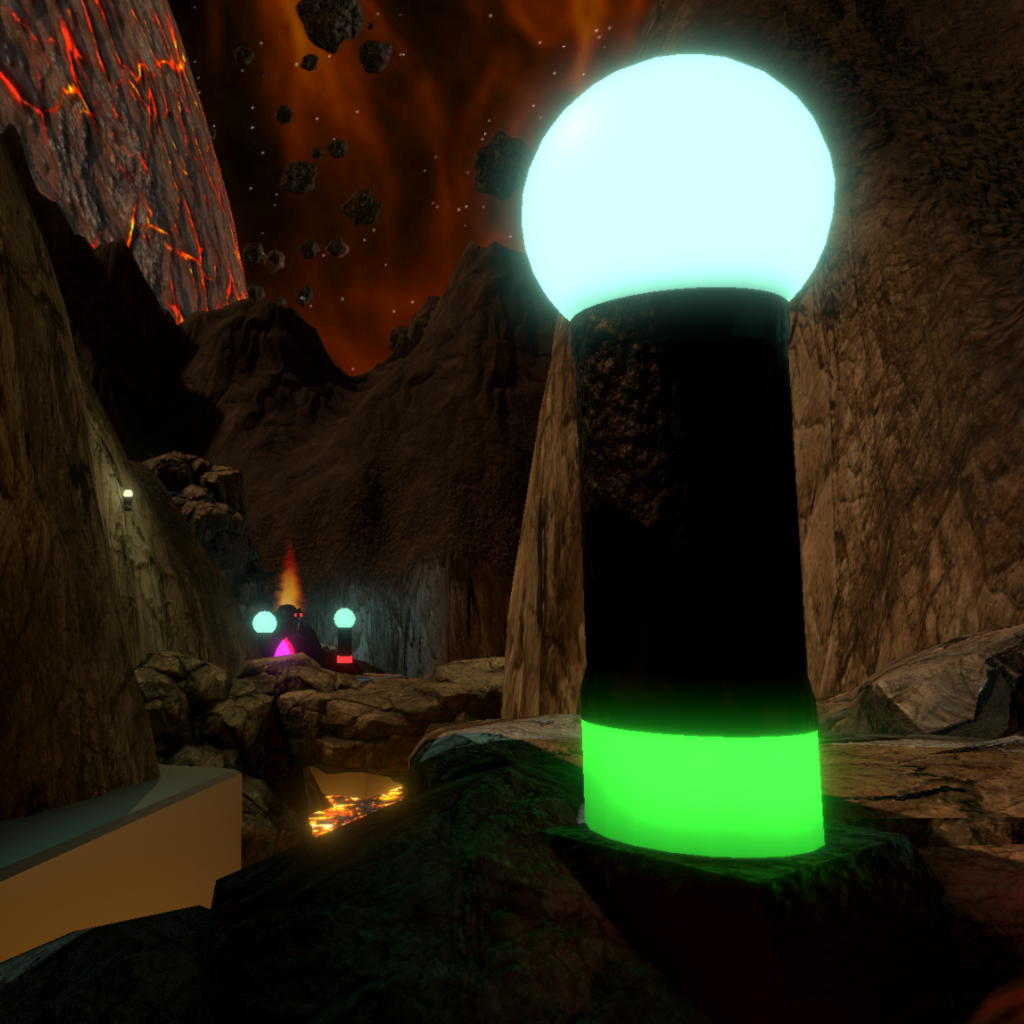 I’ve used emissive materials before, but I’ve never used them effectively. This was the first time I’ve used emissive materials in combination with the bloom post-processing effect. The combination provided much more visual interest to the various emissive materials. I did find that while the emissive materials did contribute a little to the global lighting solution, they didn’t give the surface illumination intensity I desires. In cases such as the spherical lamp on the checkpoint beacons, I embedded a point light of the same colour as the emissive texture to produce the illumination intensity I wanted. The emissive texture on the lava material, though, worked great for providing the underside illumination of various terrain assets and platforms.
The most significant lesson regarding lighting from this project was my learning to deploy and configure reflection probes. Making reflective materials is simple enough, that’s simply a matter of adjusting the metallicity and smoothness of a material, but making it reflect the surroundings correctly is a different challenge. I wanted various reflective surfaces, especially for the interior spaces in Level 2, to only reflect the objects and spaces around them, ignoring the skybox. Reflection probes and specifying objects on different layers worked great for this. Reflection probes and culling by layers is something I want to explore more in the coming months.
Durable Game Data
Having done space science research for the past 20 years and been dabbling in programming for at least 15 years before that, writing and reading data to disc is not a mystery to me. I’ve never performed these operations in a binary format within Unity, however. It was just a simple of a process as I had expected. The challenge for this project wasn’t how to write out a binary stream, but how to determine when to write to a local file when running the PC version of the game versus when to save the data using PlayerPrefs when running the WebGL browser-based version of the game. As it turns out, all I needed was the simple conditional,
if (Application.platform == RuntimePlatform.WebGLPlayer)
This allowed me to set up two different methods for saving the best and last times for each level either to a cookie if in a WebGL platform, or to a binary data file if on a local PC. This has already given me insight on how to construct a save system for a course architect function for a future autocross game.
What Went Not So Well
Haphazard Code Design
For many of the projects I’ve done so far, the coding required although individual scripts may have had some intricacies to them, the overall project design was not too complex. This project proved to be unexpectedly different. While everything does indeed work and work correctly, the structure of code, upon what objects the various scripts are placed, and the efficiency of the logic is suboptimal. I did not start with a over technical design philosophy and this resulted in a chaotic and messy evolution of the various scripts and methods written for the game. This lack of foresight made it difficult to remember which game parameters where were and it made the code significantly more complex than it needed to be.
Short on Story
At the beginning of this project, my focus was more on level geometry than the game story and motivation for the player to actually care about doing well on the level. What little story there is was added in as afterthought. The story that I did end up creating, all two sentences of it, could have been developed to work very well with the theme of the game, an agility course designed to test new recruits. This is definitely something that I need to keep in mind for future projects. Think of the story and motivation first and build that into the design from the beginning.
No Player Control Settings
While the player control settings worked well for me, I know not everyone has the same needs or preferences as me. One of the big drawbacks to the controller choice was that things such as the mouse sensitivity and the default key mapping were locked in place by the scripts used by the chosen character controller. Yes, character controllers are difficult to execute well, but the challenges lie not in the basic movement but in the handling of edge cases. This was not a complex game requiring a complex character controller. There’s no need to crouch, double-jump, wall run, or any other more sophisticated control mechanics. The character needs to walk or run forward or backward, step right or left, jump, and rotate using the mouse. That’s it.
Rather than using a prepackaged controller script, I should have written my own controller script that would have allowed the player to engage a 3rd person, following camera view. Writing my own controller script would also have allowed me to create UI elements that gave the player the control over how sensitive the mouse movement was, what buttons executed a jump or a run, or even what buttons caused longitudinal or latitudinal movement. Using someone else’s stuff saves you time, but it also constrains your options.
Lessons Learned
Build Size Optimization
In my initial iterations of this game, the build sizes were huge. My first build was over 400 MB in size which is an absolute no-go for a WebGL build. After searching for tips on how to reduce the build size of a Unity project, I found several tips related to the various image assets and to the audio assets.
Realizing that this game was likely never to be viewed at resolutions greater than 1920x1080, I realized that having 2048-pixel square texture images was rather pointless. I reduced the size of object material textures down to 1024 pixels square for the PC builds and 512 pixels square for the WebGL builds. Additionally, for the WebGL builds, textures that were never going to be seen up close were further reduced to 256 pixels square.
Some of the audio content was initially important as uncompressed, high bit rate WAV files. This consumed a significant amount of space in the final build. While an uncompressed format is desirable during the workflow, the difference in quality between a WAV and an MP3 file is not going to be noticeable to the player. Since the quality difference in miniscule, I reimported all audio assets as compressed MP3 files. These methods resulted in reducing the PC build size from over a gigabyte to under 250 MB. The WebGL build shrank even further to a final build size of 59 MB.
Audio Levels and Mixing
I’ve never worried too much about audio mixing and setting beyond simply importing the music and sound effects files and making them play at the appropriate times. In the initial versions of Fire Monkey Panic that included the demon in Level 2, there was a glaring audio glitch. The demon’s roar was overdriven and created an unpleasant distortion. This distortion was even worse and more distracting in the WebGL version. The simple fix was to bring the audio file into Audition (Audacity would have worked just as well) and apply compression, then normalizing the levels to -3dB. Problem solved.
While working on what the source of the issue was, I began playing with Unity’s Audio Mixer utility. This basically is a virtual mix board and effect machine. While I didn’t really make full use of its capabilities in this project, for future projects, I foresee this being a keyway to balance background music, nondiegetic environmental sounds, narration, and sound effects. By placing each of these different types of audio on its own channel in the Audio Mixer, not only can I adjust the balance to a level I think is appropriate, but I can enable the player to adjust this balance themselves through a settings menu. This would allow players to reduce or remove the background music if they wish or enhance the narration while deemphasizing the other sounds.
Make a Technical Design Doc
For the prototype assignments I’ve completed thus far, the coding structure has been pretty simple and going through the process of creating a system block diagram, UML class diagram, flowcharts, and all of the other aspects of crafting a functional technical design document was a bit overkill. For this project, the coding as a bit more complex. It’s not that the individual scripts involved difficult or intricate methods, but that there are a lot of different interconnected systems. Because I started with the timing and scoring code on the main character, that’s where most of the other game controlling scripts and methods went as well. This was a mistake and much of what was attached to the player character would have functioned better on a dedicated Game Controller object. Drawing out a block diagram and a simple flowchart would have made this clear and would have informed a more sensible arrangement of the various scripts and methods.
Leave a comment
Log in with itch.io to leave a comment.